Last Updated: October 28, 2026
Quick Summary
To remove caked-on grime from a garbage can, sprinkle baking soda over the buildup, spray white vinegar on top, and let it sit for 10 to 15 minutes before scrubbing with hot water and a stiff brush. Work top to bottom, then rinse until the suds run clear and air dry the bin upside down.
- Skip wire brushes because they scratch plastic and create grooves where grime settles faster.
- Always wet the surface first, since scrubbing a dry bin spreads bacteria and grinds residue deeper.
- Pay attention to the corners, inside rim, base seam, and the underside of the lid.
- Rinse with clean water until suds run clear, then air dry the bin upside down in the sun.
- Rinse completely between bleach and vinegar use, since mixing them releases chlorine gas.
Table of Contents
- Why Caked-On Grime Sticks to Trash Cans
- What You'll Need Before You Start
- Step-by-Step: How to Remove Caked-On Grime From a Garbage Can
- The Best Cleaner for Garbage Cans (and What to Avoid)
- How to Remove Trash Can Odor After Cleaning
- How Often to Clean Trash Cans to Prevent Buildup
- When DIY Cleaning Isn't Enough: Booking a Professional Bin Cleaning
- Frequently Asked Questions
Why Caked-On Grime Sticks to Trash Cans
Caked-on grime forms when food scraps, liquids, and grease dry against the plastic walls of a garbage can. Each time you toss a bag in, a little residue stays behind. Heat speeds up the process, so a bin sitting in a warm garage becomes a sticky, smelly trap fast.
The problem compounds. Grease traps dust and food particles. Moisture feeds bacteria. Over a few weeks, that mix hardens into a layer that a quick hose-down won't touch.
A common mistake is waiting until the smell becomes unbearable. By then, the buildup has bonded to the plastic and settled into every seam.
The grime isn't just on the walls. It can collect under the rim, around the base, and along the lid hinges.
What You'll Need Before You Start
Gather your supplies first so you're not hunting for a brush mid-job. A common approach is to keep a dedicated bin-cleaning kit so you never mix these items with kitchen tools.
- Rubber gloves and eye protection
- A stiff-bristled brush or long-handled scrub brush
- Dish soap or a heavy-duty degreaser
- Baking soda and white vinegar
- A garden hose or access to hot water
- A microfiber cloth for the lid and exterior
- Trash bags for relining
Skip the wire brush. It scratches plastic and creates tiny grooves where grime settles even faster. Watch out: scrubbing a dry bin spreads bacteria into the air and grinds residue deeper into the plastic. Always wet the surface first.
Step-by-Step: How to Remove Caked-On Grime From a Garbage Can
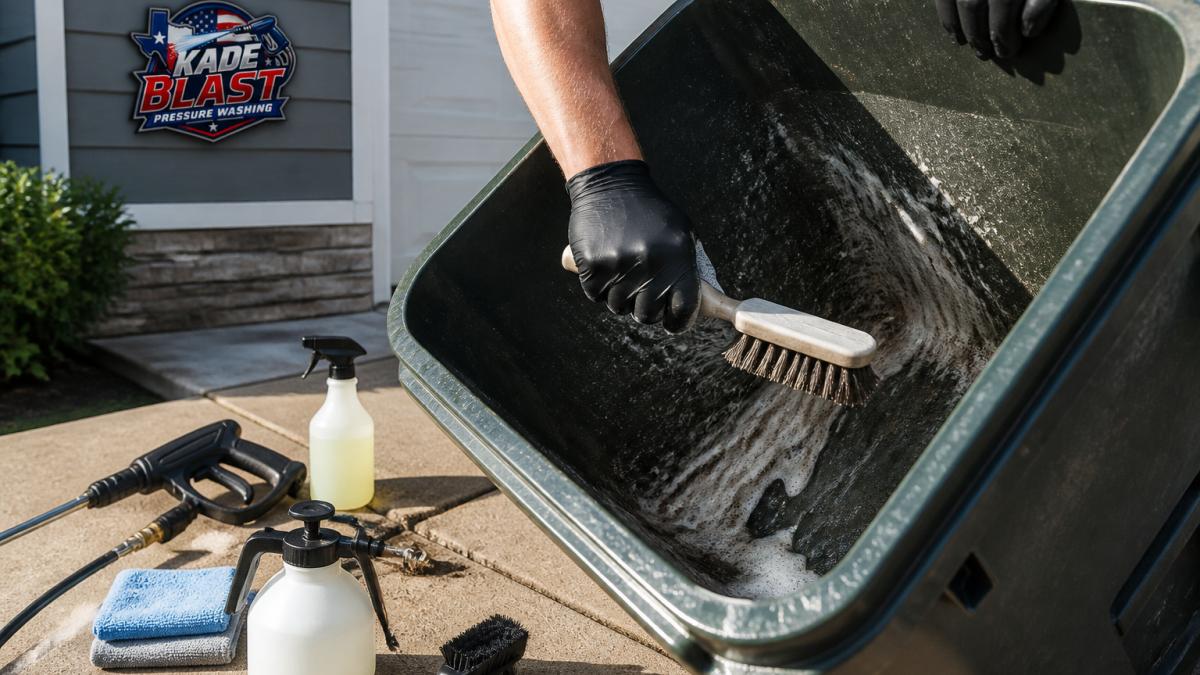
The core method is simple: empty, loosen, scrub, rinse.
Step 1: Empty and Rinse the Bin
Pull out the bag and set the bin on its side on a driveway or lawn. Rinse the inside with a hose to knock loose food debris into the grass or a drain-safe area.
Then flip the bin upside down and check the base. Standing liquid and stuck debris collect there. Pour out anything pooled, and give the walls a first pass with plain water.
Step 2: Loosen the Buildup
Sprinkle baking soda generously over the caked-on grime, then spray white vinegar on top.
Let it sit for 10 to 15 minutes. For heavy buildup, add a few drops of dish soap to the paste and work it into the worst spots with your brush.
Step 3: Scrub the Walls, Base, and Lid
Now scrub with hot water and your stiff brush. Work top to bottom so dirty water runs down, not back over clean areas. Pay attention to the corners, the inside rim, and the base seam.
Don't forget the lid. The underside of a trash can lid traps grease and odor. Wipe it with a soapy microfiber cloth, then rinse.
Step 4: Clean the Splash Guard, Sink Flange, and Chamber (Disposal Bins)
If your bin sits under a sink and shares space with a garbage disposal, the caked-on grime is not only on the can walls. It collects on four separate components, and each needs a different tool:
- Rubber splash guard: Pull the flaps back one at a time and scrub both sides with a stiff brush and hot soapy water. Most practitioners find the underside of the guard holds a black film of grease and food fiber that a sponge will not lift. Rinse the guard in place with hot water, then dry it with a microfiber cloth so mold does not start in the folds.
- Sink flange (the metal ring around the drain): Scrub the underside lip with a small detail brush and a baking-soda paste. Do not use a wire brush on a stainless flange, it leaves scratch lines that trap residue. A nylon brush or an old toothbrush works.
- Disposal chamber: With the power off at the breaker, shine a flashlight into the chamber. Use long-handled tongs to pull out fibrous debris (celery strings, onion skins, potato peels) that has wrapped around the impeller. Then scrub the chamber walls with a long-handled bottle brush and hot soapy water. Never reach in with your hand, even with the switch off.
- Nearby surfaces: The cabinet floor under the sink, the disposal's exterior housing, and the sink basin rim all collect splash and grease. Wipe them with a degreaser and a microfiber cloth after the chamber is clean, so you are not recontaminating a clean surface.
Step 5: Rinse, Dry, and Reassemble
Rinse everything with clean water until the suds run clear. Then tip the bin upside down and let it air dry in the sun. Sunlight helps dry the seams.
Once dry, wipe the exterior with a microfiber cloth, add a fresh liner, and close the lid.
| Step | What You Do | Time | Common Mistake |
|---|---|---|---|
| 1. Empty and rinse | Remove bag, rinse walls, drain base | 5 min | Skipping the base |
| 2. Loosen buildup | Baking soda + vinegar paste, sit 10-15 min | 15 min | Scrubbing too soon |
| 3. Scrub | Hot water, stiff brush, lid, splash guard | 15 min | Missing the rim and hinges |
| 4. Component pass | Splash guard, flange, chamber, nearby surfaces | 10 min | Reaching into the chamber by hand |
| 5. Rinse and dry | Clear-water rinse, air dry upside down | 2+ hrs | Relining a wet bin |
The Best Cleaner for Garbage Cans (and What to Avoid)
A simple mix of dish soap, hot water, and baking soda, with white vinegar, is one option for cleaning a garbage can.
For stubborn residue, a store-bought degreaser is another option. Check the label for plastic-safe formulas.
What to avoid: bleach-heavy cleaners that can degrade plastic over time, and abrasive powders that scratch the surface. Also skip anything that leaves a strong chemical film, since your bin holds bags that touch your hands.
Match the Cleaner to the Surface
Use this compatibility guide before you scrub:
- Stainless steel (sink flange, disposal housing, some bin exteriors): Use dish soap, baking soda paste, or a stainless-safe degreaser. Avoid bleach and chloride-based cleaners, which can pit stainless over time, and avoid steel wool or wire brushes, which leave scratch lines that trap grime. A nylon brush or microfiber cloth is the right tool.
- Rubber (splash guard, lid gaskets): Use hot soapy water and a stiff nylon brush. Vinegar is fine for odor, but do not soak rubber in bleach or solvent-based cleaners, they dry out the rubber and cause cracking. Dry the folds completely after cleaning.
- Plastic (bin walls, base, lid): Dish soap, baking soda, and vinegar are safe. Avoid abrasive powders (scouring cleansers) and wire brushes, which scratch plastic and create grooves where grime settles faster. Solvent-based degreasers can cloud some plastics; test a hidden spot first.
- Sink finishes (porcelain, composite, enamel): Use a non-abrasive cleaner. Baking soda paste is safe on most finishes; abrasive powders and acidic cleaners left to sit can dull enamel and composite. Rinse thoroughly after any vinegar application.
When Baking Soda, Vinegar, Ice, or Hot Water Do Not Work
If the grime remains after trying these cleaning methods, consider these possibilities:
- **
- **
- The disposal is clogged, not dirty. If water drains slowly or the unit hums without spinning, stop cleaning and address the clog. Do not keep running the disposal.
- A component is corroded or damaged. Cracked rubber, a pitted flange, or a worn impeller will keep trapping residue no matter how often you clean. Replacement is the fix, not more scrubbing.
How to Remove Trash Can Odor After Cleaning
After cleaning, you can deodorize the bin.
- Wipe the inside with white vinegar and let it dry
- Place a small open box of baking soda in the base
- Toss in citrus peels or a few lemon slices to freshen the air
- Sprinkle baking soda in the bottom before adding a new bag
If the odor returns, recheck under the rim and in the base seam.
How Often to Clean Trash Cans to Prevent Buildup
How often you clean trash cans depends on what you throw away and where the bin sits.
- Weekly: rinse and check for stuck debris
- Monthly: full scrub with baking soda and vinegar
- After any spill or leak: clean immediately
- Hot months: shorten the schedule
Line the bin, keep food waste bagged, and let the bin dry fully before relining.
When DIY Cleaning Isn't Enough: Booking a Professional Bin Cleaning
Kade Blast Pressure Washing uses commercial high-pressure blast technology, specialized sanitizing agents, and eco-friendly deodorizers in a fully contained cleaning process.
You don't need to be home. Book and pay online in under a minute. Recurring monthly plans are available, and service is backed by a 100% satisfaction guarantee.
You can book a professional bin cleaning.
Frequently Asked Questions
What is the best way to remove caked-on grime from a garbage bin?
Start by emptying and rinsing the bin. Scrub it with a stiff brush, then rinse thoroughly and let it dry.
How often should you clean and sanitize a trash bin?
Clean the bin when you notice persistent odor or visible buildup on the walls or lid.
Can you use a pressure washer to clean a garbage bin?
Kade Blast Pressure Washing offers professional bin cleaning using commercial high-pressure blast technology.
How do you remove odors from a trash bin after cleaning?
After scrubbing and rinsing, leave the bin open to dry. You can place a small box of baking soda or fresh citrus peels inside.
Caked-on grime wins when you put off the job, and a bin that's cleaned right the first time stays fresh far longer. When DIY no longer cuts it, Kade Blast Pressure Washing brings commercial high-pressure equipment, bacteria-killing sanitizers, and family-safe deodorizers to your curb, with online booking in under a minute and no need to be home. Get started with Kade Blast Pressure Washing and bring home an odor-free bin.
